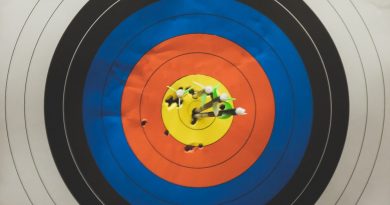
The methodology of arrow shooting
Learning and using proper shooting techniques is very essential to become a successful archer. If proper shooting techniques are employed, then the precision of the archer will improve to a great extent.
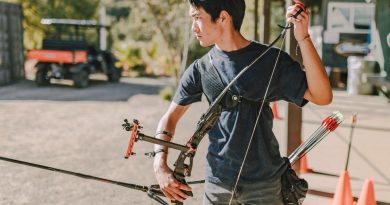
For better accuracy, appropriate shooting accessories are required to keep the archer comfortable. Basic accoutrements such as the arm guard and finger tab increase accuracy levels.
Some of the most common errors in shooting techniques are:
- Overdrawing a short arrow
- Presence of pocket items such as pens
- Improper mental programming
- Poor stances
- Bad follow through
- Poor vertical body alignments
- Poor anchor positions
- Lack of mental focus
Learning the correct positions and practicing to hold the bow are the initial steps in acquiring good archery skills. At first, one need not worry about hitting the target. Correct form and a good follow through are more important in the beginning. Next, one should focus on their mental program and develop positive mental habits. Staying focused and concentrating on the shots will produce accurate results. Repetitive practice and rehearsal of the mental program will also fetch great results. Once the archer is adequately rehearsed they will be free of the pressure and anxiety of the competition.
Body positions and alignments play a very crucial role in the accuracy of shots. The body should be aligned to suit the independent stances. Moreover, the body should not incline or fall in one direction. There are specific exercises designed to strengthen the upper body muscles, especially the back muscles, for better hold and support of the bow.
Experienced archers stress on concentration and focus as the keys to victory in competition. They also say that focusing and concentration can be achieved only through proper mental programming. A mental program is a set of step-by-step procedures that the archer is expected to follow during competitions. This significantly decreases the chance of failure. The mental programming should be well-rehearsed and practiced regularly so that it comes naturally to an archer during competition. This practice helps the archer to concentrate and stay focused while it also alleviates tension during the competition. There is no ready-to-use mental check up list. Suitable mental check up lists are formed by individual archers to suit their specific needs.
Here is an example of a mental check list:
1) Stance
i) Position stance
ii) Nock arrow
2) Draw and aim
i) Set bow hold
ii) Set draw hand hook
iii) Raise bow and draw
iv) Anchor
v) Align sight and level bow
vi) Establish string pattern and sight picture
vii) Focus, steady, and aim
3) Release and follow through
i) Tighten back muscles
ii) Relax draw hand and ready for release
iii) Raise the bow arm and keep steady
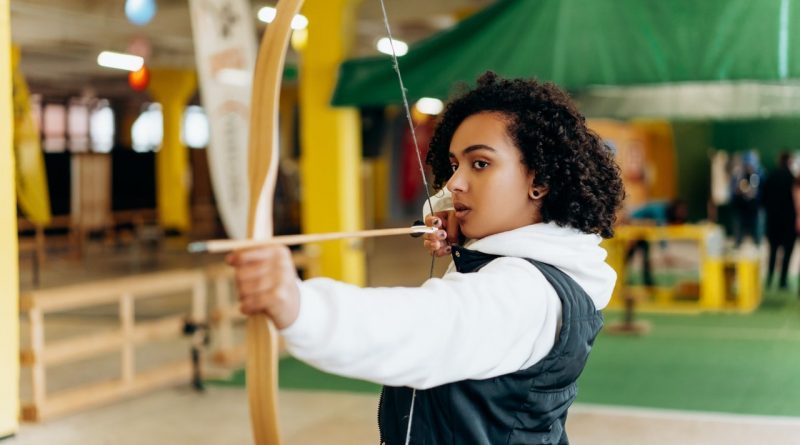
Stances
For proper balance, the archer has to distribute their body weight evenly. This is achieved by proper stances. Proper positioning and stances should enable the archer to deliver consistent shots. There are several types of stances and the pros and cons of each of them are described below.
There are 4 types of stances which differ from each other in their feet placement. They are:
1. Even stance
2. Open stance
3. Close stance
4. Oblique stance
Even stance
The even stance mimics the natural position and it is easy to reproduce. However, it has a small base of support and as the body is not well supported, the body can sway in high winds. Besides, this stance lowers the area for string clearance, especially for large-chested archers.
Open stance
Open stance offers a stable support base and decreases the tendency to lean back from the target. However, it has the tendency to make the upper portion of the body twist toward the target. It also uses the arm muscles more than the back muscles for drawing the arrow.
Closed stance
Closed stance provides a stable support base and also offers a good alignment of the arm and shoulder in the line of target. However, it reduces string clearance and, therefore, there is a risk of the string striking against the body. It may also cause the shooter to lean away from the target and overdraw the arrow.
Oblique stance
Oblique stance offers the greatest clearance space for the bowstring when the arrow is released. In this stance the body is maintained at full equilibrium and the visibility of the target is also the best. However, maintenance of this posture is very hard and can be accomplished only by experienced archers.
Whichever stance the archer opts for, to start with, the exact placement of the feet on the shooting line should be well marked. Experienced shooters say that small deviations of even a few inches could result in sighting and aiming problems, which, in turn, can cause accuracy problems.
Many scientific studies recommend open and oblique stances over the other two. However, archers should not base their decision entirely on this. Individual choices and comforts are more important in the pleasure of target archery.
Many archers choose to adopt the even stance. In this stance, the total weight of the archer is evenly distributed between both feet and the heels and toes are aligned. The middle of the instep of the foot is aligned to the target center. However, for a beginner, the open stance is always recommended during their initial learning period. In the open stance, the feet will be placed shoulder-width apart. The archer is required to spread their body weight evenly on both feet. The left foot should be placed about 6 inches backwards.
A few very experienced archers use the oblique stance. In this stance the archer places the left foot close to the target on a line and turns the left foot 45 degrees to the target. The heel of the right foot is placed in line with the toe of the left foot. This permits the bow arm to be placed in a position where there will be optimum clearance for the bowstring. The visibility of the target is excellent in this stance.
In the closed stance the shooting line is straddled and the weight of the archer is uniformly spread between both feet. The left foot is placed forward by a few inches so a heel-toe alingnment exists between the left and right feet, respectively.
Steps of shooting
The four important steps in archery are:
- Nocking
- Drawing
- Anchor Point
- Release and follow through.
These steps should be meticulously observed and used for better accuracy.
Nocking
Nocking of the arrow is nothing but the proper placement of the arrow on the bowstring in shooting position. Nocking points are placed slightly wider than the width of the arrow nock so that adjustments over the string are possible. Shooting is said to start when the shooter positions the bow next to the hip. Nocking starts from the time the archer takes up their stance posture. The arrow will be positioned on the bowstring with the index feather upward at the serving. The traditional nocking angle of 90 degrees needs to be maintained between the arrow and the bowstring.
Draw and Aim
Bow Hold
Bow holding is the next important step the novice archer should master. The fingers should be kept relaxed and proper accessories such as arm guard should be used. Hand pressure should be adjusted to high, low, or on the bow’s turning point depending on the type of the bow and the intention of the archer.
The bow should be held using the thumb and index finger only. The index finger may wrap around the bow but should not grip the bow. All the fingers should be kept relaxed. Archers may experience finger fatigue and can loose concentration during archery. One simple technique they adopt to overcome this is to rotate the thumb counterclockwise against the bow handle and simultaneously extend the thumb on a forward direction toward the target. This process is called supination. This is an excellent technique used by archers to relax the thumb and reduce fatigue.
The archer should not apply pressure on the bow using their palm. Relaxation is the primary necessity of target archery. Experienced archers know when to relax. Mental programming is the key to such relaxation. This helps increase accuracy.
Draw Hand and Hook
The act of pulling the bowstring to the anchor point on the archer’s face is called drawing. While doing so the archer should exercise controlled breathing. Throughout the period of drawing, aiming, and releasing the archer should breathe calmly and maintain stable arms for precise shooting.
While nocking the arrow the archers should practice the traditional three-finger grip. They should use the index finger and the middle two fingers while nocking. Learning and maintaining this position is hard as it increases the pressure during the draw. The increase in pressure in the fingers will depend on the finger musculature of the archer and the archer’s previous practice.
If excessive finger pressure is applied on the arrow nock, the arrows will wave around and fall off the arrow rest during the draw. This problem can be countered by using a release aid. However, release aids take a significant amount of the ‘sport’ away from archery. This is why target archery rules prohibit the use of release aids. With release aids forbidden, the archer faces the challenge of controlling the finger pressure during the draw and release. In some other archery sports the usage of release aids are considered legal.
Raise Bow and Draw
The body position should be properly aligned and proper stance should be taken. Then, the bow should be gently raised and the archer should look at the target. Then the arrow should be drawn and aimed at the target.
Anchor point
Anchor point is the point on the face of the archer that touches the hand when the bowstring is at full draw. Proper and comfortable anchor points are known to improve accuracy. Anchor points play a pivotal role in aiming and target hitting. Anchor points could be high, side, or low.
Low Anchor Point
The low anchor point is placed under the chin and two touch points always provide consistency. This helps stop overdrawing. The lower placement of the anchor point facilitates long-distance shots with lesser sight movement. However, low anchor points do not suit archers with large hands or short necks. Due to its placement, it takes longer time to position and it tips the head.
Side Anchor Point
Side anchor point enables the archer to take quick position but allows overdrawing and creeping.
High Anchor Point
High anchor point is the point over or near the bone that is placed inferior and lateral to the eye. It permits the archer to partially sight down the arrow shaft and over the point if a bowsight is not being used. The disadvantage is that high anchor points do not have a bowsight.
Anchor points are not fixed positions and can change with the facial contour and the type of archery. Most bow hunters, field archers, and instinctive shooters use high anchor point. Usually, in the beginning, the archers will find it difficult to choose their anchor points. However, in due course, they will understand the differences between different anchor points and choose the ones that suit them best. For beginners the low anchor point is usually recommended.
Another way to increase accuracy is to ensure correct bowstring alignment.
Align Sight and Level Bow
The sight level and the bow level should be aligned correctly during the draw for maximum accuracy. Poor alignment can occur due to improper habits or fatigue. To counter this problem, beginners should choose a bow of weight that best suits them. They should also practice properly to ensure correct bow alignment. While men can use a 35-pound bow, small women should choose a bow of about 25 to 30 pounds of draw weight.
Establish String Pattern and Sight Picture
The importance of string pattern and sight picture cannot be over emphasized. The beginner should always form a mental picture of the target and visualize it before proceeding. Then the archer should take a proper stance and arm themselves with accessories for the draw. The nocking position and alignment of the body should be checked and rechecked before the draw.
Focus, Steady, Aim
After positioning the stance and body alignment, the archer should focus. The archer should steady the bow hold position and take aim at the target. The hand should always be kept steady during the whole procedure. The bow will tremble in the archer’s hand if it is too heavy for the archer. For a proper shot the bow should be kept from trembling for at least 5 seconds.
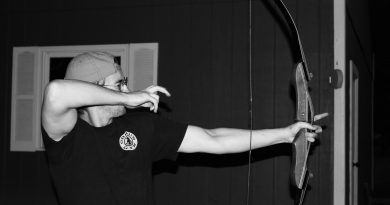
Release and follow through
Proper release of the arrow is the central theme of good archery. Follow through refers to the holding of the release position until the arrow is safely launched onto the target. The central features of follow through are relaxation and concentration. A good follow through should feature relaxed fingers on the bowstring, turning of both head and eyes toward the target following the discharge of the arrow, the extending of the bow arm toward the target and the gripping of the bow hand using a bow sling.
A bow sling helps the archer during release and follow through. There are four types of bow slings for the archer to choose from. A bow sling essentially helps the archer by preventing the bow from falling down after the arrow’s release.
The elbow of the bowstring arm should not hyper-extend during or after the arrow release. A natural recoil is expected and normal but the starter should not hyper-extend the wrist or allow rolling of the finger tips under its own pressure.
Tighten Back Muscles
For shooting the arrow, the archer should tighten their back muscles and draw the bow string. The back and arms of the archer should be placed straight at the target. Archery requires lot of muscle strength just like other sports. Perform specific exercises to strengthen the muscles of the arm and the back. This will help the beginners gain physical strength and aid them in arrow draw.
Relax Draw Hand to Release
The archer should keep the bow hold easy and relaxed. The archer should never grip the bow very tightly. The palm should just gently touch the nock. This way of doing things will reduce fatigue.
Keep Bow Arm Up and Steady
For the arrow to be accurate the archer should keep both the hands and arms steady even after releasing the arrow. If the arms are unsteady after release, the arrow will not be on target.
These are proven methods of excellent archery. However, the archer should equip themselves with proper practice and mastery over forms. New techniques and skills are bound to be discovered by the archer as they gain more experience. Whether the archer wants to become the Champion of Archery or just wants to improve their scores, the one advice experienced shooters offer is ‘constant practice’. The technique to become the best archer in the world is not taught by anyone but it is learned by the archer by hard practice.